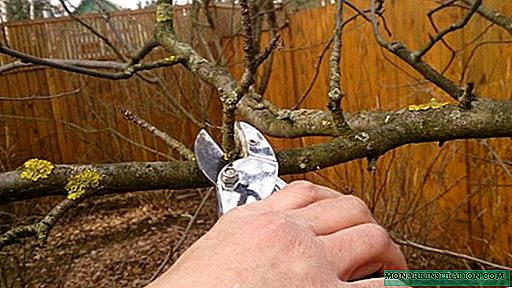
Any gardener knows that the correct preparation and planting of seedlings is the key to plant health and future crops, and cabbage is no exception in this regard. Since this culture is notable for its demanding conditions, it is necessary to familiarize yourself with the basic information that relates to growing seedlings and planting it in the ground.
Growing cabbage seedlings
In order to get high-quality and healthy seedlings, you need to observe the sowing dates, as well as correctly process and sow the seeds.
Sowing dates - table
| Characteristic | Early grades | Mid-season varieties | Late grades |
| Sowing dates | Early March | The third decade of March - mid-April | You can sow all April |
Presowing seed treatment
To ensure seed germination and protect future crops from diseases, it is necessary to calibrate, disinfect and soak them. But before you start pre-sowing preparation of seeds, especially unpainted, carefully study the packaging. The fact is that the seeds can already be processed, and therefore they do not need additional procedures. Also, it is not necessary to process colored (green, orange, etc.) seeds for the same reason.

Colored seeds do not need presowing treatment, as they are already enriched with nutrients
For all work, try to use only soft water - melt, boiled, rain or settled for more than a day.
Presowing events - table
| Title | Calibration | Disinfection | Soak |
| Technology |
|
Also, some gardeners prefer to disinfect the seeds by heating, placing them for 15-20 minutes in hot water (+48aboutC - +50aboutC), and then in the cold for 1-2 minutes. Then the seeds need to be dried. |
Seeds should be soaked for 12 hours. Try to change the water every 4 hours. After this time, remove and dry the seeds, and then immediately begin to sow them. |

To get healthy seedlings, you need to properly prepare the seeds for sowing
Sowing in a standard capacity (in a container)
Most gardeners prefer to plant cabbage in this way, since it is quite simple and does not require the use of any unusual materials.

Cabbage seedlings feel good in shallow containers
2-3 days before sowing, disinfect the soil by moistening it, spreading it on a baking sheet with a layer of 5 cm and baking in the oven for 30 minutes at a temperature of 70 ° C.
Sowing technology:
- Prepare shallow containers and make drainage holes in them.
- Pour 1-2 cm of drainage material (fine gravel, expanded clay).
- Pour the soil with a layer of 6-8 cm. The composition of the soil can be as follows:
- Peat (75%) + turf land (20%) + sand (5%).
- Humus (45%) + turf land (50%) + sand (5%).
- Sod land (30%) + humus or compost (30%) + peat (30%) + sand (10%).
- Compost (2 parts) + sand (1 part) + rotted sawdust (1 part).
- Also, some gardeners recommend adding 1 tbsp. l ash for every kg of soil. This will enrich it with nutrients and protect seedlings from the "black leg".
- Moisten the soil well with a spray gun.
- Make grooves 1 cm deep at a distance of 3 cm from each other.
- Sow the seeds, observing a distance of 1 cm between them, and sprinkle the crops with soil.
- Remove the blank under the film (plastic bag) or glass and put in a warm sunny place.
If you do not want to pick, immediately sow the seeds of 2-3 pieces in individual containers (peat pots, plastic cups, etc. with a volume of 100 - 150 ml), filling them with 2/3 of the soil. When the seedlings grow, leave the strongest shoot, and remove the rest or pinch if the sprouts are close.
Shoots should appear in 4-5 days. During this time, try not to water the crops to prevent rot. If the soil is very dry, then moderate it with a weak solution of potassium permanganate (dilute the powder on the tip of a knife without a slide in a glass of water). Also keep the air temperature within +18aboutC - +20aboutFROM. As soon as the shoots appear, remove the film and provide the crops with a temperature of no higher than +7 within 7-10 daysaboutC - +9aboutC, otherwise the sprouts will stretch and die. Watering is moderate, when the topsoil is dried, the water should flow under the root, without falling onto the leaves. Loosen the soil from time to time to avoid crusting. Also note that cabbage seedlings require a lot of light (12-15 hours per day), so if necessary, light it with a fluorescent lamp, placing it at a distance of 50 cm from the seedling containers.
Picking seedlings
To carry out a pick, that is, to sprout shoots in individual pots, it is necessary when 1-2 real leaves appear on the seedlings. This usually occurs 10-15 days after sowing.

During the dive shoots are seated in separate containers
Technology of carrying out:
- Prepare individual containers with a volume of 100 - 150 ml, make drainage holes in them and pour the drainage material with a layer of 2-3 cm.
- Fill containers with soil.
- Using a fork, remove several shoots from a common drawer along with a lump of earth.
- Separate one shoot, trying to hold it by the cotyledon (the lowest leaves) so as not to damage the stem.
- If desired, cut the main root 1/3 cm. So the plant will develop a system of lateral roots, which will allow it to extract nutrients, but it will become more difficult to obtain water.
- Make a hole in the ground so that the roots fit into it freely. Depth - 5-6 cm.
- Carefully place the shoot in it and deepen it to the cotyledon leaves.
- Water the escape. If the soil settles, pour it again to the cotyledon leaves.
- Sprinkle a layer of calcined sand 2-3 cm thick.
Place containers with seedlings in a rather warm place (+17aboutC - +18aboutC) for 2-3 days. When the seedlings take root, then rearrange the pots in a colder place with a temperature of +13aboutC ... +14aboutHappy and +10aboutC ... +12aboutWith the night.
Dive video
During the time that the seedlings are at home, it must be fed in order to ensure the best development of the shoots.
Feeding scheme - table
| Precedence | First feeding | Second feeding | Third feeding |
| Period | Held a week after a dive. | 2 weeks after the first feeding | 5 days before planting seedlings in the ground |
| Solution composition | Ammonium nitrate (2 g) + superphosphate (4 g) + potassium sulfate (1 g) + 1 liter of water. | Prepare the same solution by doubling the amount of fertilizer. | Prepare a solution with the same amount of nitrate and superphosphate as for the first feeding, and 6 g of potassium sulfate. |
Non-standard containers for sowing
In addition to boxes and pots, there are several types of containers in which you can prepare seedlings.
Snail
To make a snail, you will need an isolon cut into ribbons 10-15 cm wide (preferably 30-35 cm long), rubber bands and a container with high sides (you can take several small ones and place 1-3 snails in each).

The snail provides the necessary temperature and soil moisture
Sowing technology:
- Spread the tape, pour soil on it with a layer no thicker than 1 cm. You do not need to fill up the entire length immediately. You can immediately moisten the substrate.
- Step back 1.5 - 2 cm from the top edge and gently lay the seeds along it at a distance of 2-2.5 cm from each other, deepening them. For convenience, use tweezers.
- Roll the workpiece tightly to a free space.
- Add soil to the rest of the tape and continue sowing in the same way.
- Fold the remaining tape and secure the resulting roll with an elastic band.
- Place the cochlea in a container with crops up and water if you have been working with a dry substrate.
- Cover the workpiece with a plastic bag or film and place in a warm, sunny place.
The nursing care is the same. When 1-2 real leaves appear on the shoots, pick. To prevent the soil from drying out, put a snail in a layer of moistened sawdust.
Making a snail - video
Toilet paper
This method of preparing seedlings is similar to the previous one, but it has a significant plus: since the soil is not used here, your seedlings will not suffer from pests or rot living in it.

A paper snail takes up little space and does not require soil work
Sowing technology:
- Prepare strips of toilet paper 40-50 cm long.
- Moisten them from the spray gun.
- Step back from the top edge of 1.5 cm and lay seeds along it at a distance of 2-2.5 cm from each other. For convenience, you can use tweezers.
- Cover the crops with a second strip of paper and moisten it from the spray bottle.
- Cover the top strip of paper with a strip of film (it should match the width and length of the paper strips).
- Roll the workpiece into a roll and secure with an elastic band.
- Place the workpiece sowing up in a disposable cup with a thin layer of moistened sawdust, cover with a bag and place in a warm place.
Seedling care is the same. When 1-2 real leaflets appear on the sprouts, peck them into separate containers, separating a piece of paper with the sprout.
I put a lot of things in snails. I also tried tomatoes for the sake of experiment. I did not like it, then they would still be transplanted anyway. Excessive fuss, but, let’s say, cabbage or marigolds can be immediately after the snail in the ground. My snail is this: film - toilet paper - lay out the seeds after about 1 cm - again toilet paper - film. We wrap everything in a snail and in a glass. In a glass on the bottom of the water. Toilet paper itself absorbs as needed.
OlgaP//www.tomat-pomidor.com/newforum/index.php?topic=1479.220
Cassette
Sowing seeds in this way does not require you to dive further, and also allows you to compactly grow even a large number of seedlings.

The cassette provides the crops with the same amount of sunlight and makes it easy to extract the plant during transplantation
Sowing technology:
- Prepare wet soil by mixing peat (2 parts) and steamed sawdust (1 part), and fill them with cells below the junction.
- Place 1 seed in each cassette, making 0.5 cm deep in the center of the hole.
- Sprinkle inoculum with soil, and then mulch with a layer (2 mm) of vermiculite.
- Cover the crops with foil and put in a warm bright place.
Care and temperature are normal, but make sure that the soil does not dry out in the first 2 days.
Hello dear readers! In the Magnit store, I saw comfortable, plastic and miniature cassettes for seedlings. But I wanted to grow something on my windowsill. I bought one cassette, and the seeds of parsley, dill and a climbing flower (stupid). Cassette for 6 cells. The cells are quite deep and spacious. At the bottom of the cell, there is a hole for draining the liquid. Since there is no cassette stand, I had to use a large plate. The cassette is convenient and easy to use. He poured drainage, soil, covered seeds and wait for them to grow. Do not forget, of course, to water and loosen the earth. The idea is good. But the lack of a cassette holder is, of course, a minus.
AnnaAndreeva1978//otzovik.com/review_3284823.html
Hydrogel
A fairly new way of preparing seedlings, which gives good results. If you want to sow cabbage in this way, then get a gel with small granules.

Using a hydrogel allows you to grow high-quality seedlings
Sowing technology:
- Prepare a solution, diluting 1 tbsp. l granules in 1 liter of cold water and mixing them thoroughly. The resulting mixture should turn into jelly in 8-12 hours.
- Place the jelly in the seating containers (disposable cups will do).
- Sprinkle the seeds on the surface in random order, deepening them by 0.5 cm.
- Cover the containers with a plastic bag or film and place in a warm place.
Seedling care is the same, but watering should be rarer, since the hydrogel absorbs and retains moisture well.
This is not the first year I've sprouted seeds in g / gel. I love. But under seedlings, I do not mix it with the soil. I do this: pour soil into a glass, make a small deepening in the middle, put a little gel there, a pecked seed on it and cover it with soil a little bit. You can, of course, simply mix with the soil, but I see no reason. Seedlings grow at home and it’s easy to regulate watering. But in the country, it’s a completely different matter when you come only for the weekend. I do not regret in the landing pits of the gel.
Emmma//forum.prihoz.ru/viewtopic.php?t=4326
Bank
Another unusual sowing tank is a glass jar. If you decide to prepare seedlings in this way, then stock up on a 1 liter jar.

When preparing the can for sowing, do not forget about vermiculite, otherwise water will stagnate in the soil
Sowing technology:
- At the bottom of the jar, pour a layer of vermiculite (2-3 cm).
- Fill the jar with about half the primer.
- Sprinkle the seeds on top so that they are a short distance from each other.
- Well moisten the soil and sprinkle a layer of earth (1 cm) on top of the seeds.
- Cover the jar with a bag, close the lid and put in a warm, bright place.
Landing care is standard. Note that subsequently your sprouts will need a pick. Before removing the sprouts from the can, moisten the soil well so that it becomes liquid, and then gently pull the sprout out with your fingers. Experienced gardeners then recommend planting cabbage in a snail, only in this case, use not an isolon, but an ordinary plastic bag for the manufacture.
Sowing cabbage in a jar - video
Planting cabbage in the open ground
There are many ways to plant seedlings or cabbage seeds in the ground, and you can choose the most suitable for you.
Planting in the soil
In order to provide the cabbage with favorable conditions for growth, it is necessary to choose the right place for the beds and fertilize it with all the necessary components.
Site preparation
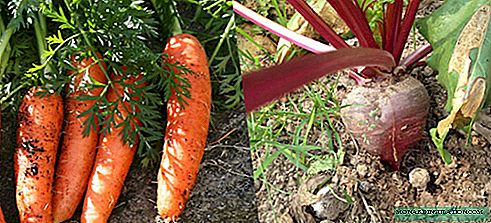
Cabbage is a crop that is very demanding on the quality of the soil, so when choosing a site, it is important to consider what vegetables grew on it before. Good precursors for cabbage are carrots, potatoes, eggplant, cucumbers, legumes and onions. And after beets, radishes, tomatoes, radishes and turnips, it is undesirable to use the site. Also, cabbage should not have been grown on it in the previous 3 years.
To grow cabbage, you need to select a site with fertile neutral soils (loam is good), located in an open sunny place. As a rule, they begin to prepare the garden in the fall, before freezing occurs, but if you do not have time to do this, then you can fertilize the soil with all the necessary components 10-14 days before transplanting. For digging, apply the following fertilizers per 1 m2:
- Organics Add 5-7 kg of dry manure or the same amount of rotted compost. If you want to use dry chicken droppings, then you need to take it less - 0.3 - 0.5 kg. It is also useful to use ash (1-2 glasses).
- Mineral fertilizers. Urea (40 g), double superphosphate (35 g), potassium sulfate (40 g) are suitable.Some gardeners believe that the cabbage growing in the soil is not very responsive to mineral fertilizing, so it is advisable to introduce such a complex in cases where you have not fertilized seedlings or the soil on your site is poor and has not improved for a long time. In all other cases, you can do with organic top dressing.
If the soil on the site is acidified, then liming in autumn or spring in early April, adding 200-300 g / m for digging2 slaked lime or dolomite flour. If the soil is not dry enough and you can’t dig it out, then sprinkle the powder on the surface.
Signs of acidic soils are light plaque on the surface, rusty water in the pits and an abundance of horsetail or dandelion.
If you do not have the opportunity to prepare the entire plot, then you can fertilize only the holes when planting seedlings.
Transplanting
As a rule, cabbage of early varieties is planted in open ground during the period from late April to early May, mid-season - in late May, late-ripening - from late May to mid-June. By this time, the shoots should have at least 5-6 leaves. In addition, 2 weeks before landing, it is necessary to temper. To do this, leave the seedlings in the open air with a slight shade at first for 2-3 hours, gradually lengthening the period of stay and increasing the amount of light. In the last 2-3 days before planting, it is advisable to leave the seedlings in the open air all night.

It is necessary to plant cabbage together with a lump of land, so as not to injure the roots
For a landing it is advisable to choose a cloudy day, and if the weather is sunny, then start work in the afternoon, when the sun will be less active. To make it easier to extract the shoots, do not water the seedlings before planting for several days.
Seedling planting technology:
- Dig and loosen the bed. If you fertilized the bed in the spring, then it is permissible to carry out a shallow digging with a pitchfork.
- Make holes with a diameter of 20 cm and a depth of 15-20 cm, it can be staggered. If you have previously fertilized the soil, then you can reduce the size of the hole by 1/3. The distance between the holes in the row and rows depends on the variety:
- Early ripe varieties, hybrids - 35 cm, 50 cm.
- Mid-season grades - 50 cm, 60 cm.
- Late ripening varieties - 60 cm, 70 cm.
- Add nutrients to each well if you have not fertilized the area:
- Sprinkle 100 g of dry manure or humus.
- Pour 2-3 tbsp. l ashes.
- Sprinkle with earth removed from the hole above.
- Pour plenty of water into the well, incl. and unfertilized. Water consumption - about 1 liter. If you fertilized a hole, then you can leave it to warm for 1-1.5 hours.
- Carefully remove the sprout from the pot by turning it over and place in the hole. If you used peat containers, then plant seedlings with it.
- Place the sprout in the hole, deepening it to the cotyledon leaves. Compact the soil.
- Water the planting again, trying to moisten the soil around the sprouts. If the seedlings have died, then straighten it, sprinkling the earth to the stem.
- After 30 minutes, water the plantings again and mulch the soil according to the diameter of the hole (dry soil or sawdust will do).
The first 3-4 days, while the seedlings take root, try to shade it.
If you have space left, next to cabbage you can place dill, spinach, cucumbers, potatoes, beans, peas and celery.
Planting seedlings in the ground - video
How to plant cabbage on straw
There are two options for planting cabbage in straw, and you can choose the most convenient for you.
Option 1 (without beds)
To plant cabbage in this way, you will need a few bales of straw.

Straw provides the roots with the necessary temperature and protects the plants from weeds
Find an even sunny place on your site and place bales on them (the narrow side should be on the ground). Do not forget to lay dense material under them, for example, a film, in order to avoid germination through a bale of weeds. Do not remove the rope, otherwise the bale will fall apart.
Sowing technology:
- You need to start cooking straw 10-14 days before transplanting seedlings. Pip 700 g of compost into each bale and water well. After 3 days, watering should be repeated.
- In the middle of the second week, again apply compost (300 g) for three days, moistening the substrate.
- At the end of the second week, add 300 g of ash to each bale.
- When the straw is ready, make holes in it of such a size that a sprout fits in it along with a lump of earth.
- Remove the sprout from the pot along with a lump of earth and carefully place in the hole.
- Well moisten the planting by pouring 1-1.5 liters of water under each plant.
To determine that the straw is ready for planting, stick your hand inside the bale. If you feel the heat, it means that you can start planting. Another sign of readiness is the presence of black spots in the straw - fungi.
It is worth noting that this method is not very popular among gardeners.
Specifically, such a method, as described in the article on cultivating plants on straw, is most likely an amateur, and, in my opinion, very costly: firstly, because if the soil lacks nutrients, it is better to fertilize it with ordinary humus or semi-matured manure, secondly, with this method of growing, abundant watering of plants is required, otherwise the roots will simply dry out, and thirdly, fertilizers in such a bed will simply not stay, during heavy irrigation they will be washed out into the soil.
Olga Cheboha//www.ogorod.ru/forum/topic/412-kak-vyirastit-ovoshhi-na-solome/
Option 2 (with a bed)
There is an easier option for planting cabbage in straw.

Planting under mulch allows plants to receive nutrients from the soil
Landing technology:
- Cover the prepared area with a straw layer of 7-9 cm.
- Before planting, rake the straw so that open areas with a diameter of 15-20 cm are formed.
- Make holes in the ground, add fertilizer and water if necessary.
- Place 1 shoot in each hole with a lump of earth and cover with soil with compaction.
- Mulch the open area with straw.
Planting cabbage in a straw - video
Reckless way of sowing cabbage
If you do not have time or desire to prepare seedlings, then you can try to grow cabbage immediately by direct sowing in the ground.
Sowing in the greenhouse
In order to sow cabbage in this way, you must have a polycarbonate greenhouse on the site.

When sowing cabbage in a greenhouse, you must follow the same rules as when sowing seedlings
- In the fall, prepare the soil, making all the necessary fertilizers.
- In the spring, in the second decade of April, dig and loosen the soil.
- In moistened ground, make grooves 1.5 cm deep and sow the seeds 1 cm apart.
- Fill the crops with humus or earth.
Crop care is the same as when preparing seedlings. When 5-6 leaves are formed on the shoots, transplant them in open ground to a permanent place.
Sowing under a plastic bottle
This method is suitable for you if you want to immediately sow the seeds in the ground. Stock up on a glass bottle and several plastic ones (you need to take them by the number of seeds). For plastic bottles, cut the bottom.

Under the bottles you can sow seeds and plant early seedlings
Sowing technology:
- Moisten the bed in advance. When it dries a little, start sowing.
- Use a glass bottle to make even depressions in the ground (see the layout for the location).
- Sow 3-4 seeds in the center of each well. Along the edges, experienced gardeners are advised to sprinkle 0.5 tbsp. l soda.
- Sprinkle each well with 1 tbsp. l humus.
- Close each well with a bottle by sticking it in the ground and slightly hilling it.
Planting care is standard (watering after emergence, loosening the soil, airing).
This method is also suitable for early planting seedlings in the ground.
Two leaflets are also in the ground under a cropped bottle. I keep the bottle cap open, I do not remove the bottle until it is well established. All this time, she was saved from a cruciferous flea. This year I want to plant under 5 liter bottles so as not to take off longer.
OlgaP//www.tomat-pomidor.com/newforum/index.php?topic=1479.220
Sowing under the hood - video
Sowing under the can
This method is also used if you want to plant cabbage in a seedling-free manner without transplanting. The sowing pattern is recommended to be the same for all varieties: 25 cm between plants in a row and 45 cm between rows.
Sowing technology:
- Make holes in the selected area. If the soil has not improved, then fertilize them, cover with soil and water.
- In the soil, make 3-4 pits 1-2 cm deep and place one seed in them.
- Cover the crops with a glass jar. From time to time it needs to be lifted to provide ventilation.
- When shoots appear, select the strongest sprout, and pinch the rest.
Leave the sprout under the jar until it is completely filled. Leaving consists in timely watering, airing and loosening of the soil.
To protect the sprouts from slugs, place a fence around them - a ring cut from a plastic bottle.
As you can see, cabbage seedlings will need to invest enough time and energy into caring for it, and gardeners, especially beginners, will have to work hard to get a quality plant. But the work itself, although time-consuming, does not differ in complexity, therefore, it is enough to study the basic instructions for their implementation in order to perform everything correctly and get the necessary result.