Blackcurrant is not only very tasty, but also extremely useful berry, so most gardeners find a place for several bushes on their site. And in areas with a temperate climate, it is generally included in the list of "mandatory planting crops." But each bush has its own productive period. If at the same time you want to keep the variety, you will have to purchase new seedlings or take cuttings from an old plant. There is nothing complicated in the planting procedure itself; it can be done even by a novice gardener.
Is it possible to plant black currants in spring
The best time for planting black currants is traditionally considered the end of summer or early autumn. In regions with a warm subtropical climate, this period stretches until early October. Time must be calculated so that at least two months remain before the first frost. During the autumn planting, the plant manages to adapt to new living conditions, during the winter the soil around the roots becomes denser, in the spring they start growing, the bush quickly gains green mass.
Autumn planting is considered preferable because in the spring currant bushes start growing very early, forming leafy buds. Usually this happens in the third decade of April or in the early days of May, so you can simply not be in time. If the leaf buds on the branches turned into sharp greenish cones, it is still possible to plant black currants, with the leaves opening - it is already undesirable. Such bushes are much harder to tolerate stress associated with changing environmental conditions.

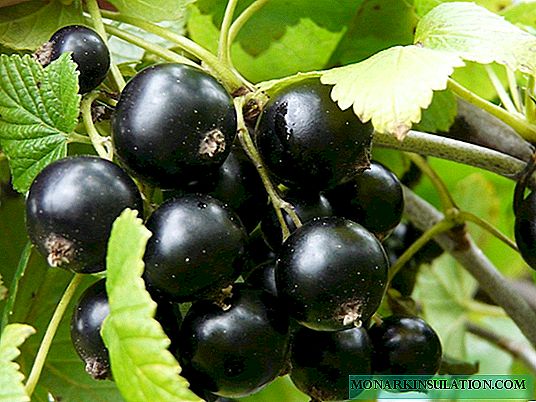
The productive period of the blackcurrant bush is 8-10 years, the best of them I want to keep on the site
Nevertheless, spring planting is the only option for regions with little snowy cold winters. In this case, there is more than a real risk of freezing of young roots. At the same time, currant seedlings purchased the previous fall are planted. Most gardeners shop at this time, because the range is much wider. You can buy seedlings of rare and scarce varieties. Such plants are dug up so that they winter, it is too late to plant them. At the end of winter, they surely cut off all available branches by two-thirds to prevent premature kidney formation.
In the spring, currants are planted as early as possible. You just need to wait for the snow to fall and the soil to completely thaw (to a depth of about 20 cm). The exact time may vary by region. In areas with a temperate climate, you have to wait until mid-April or even until early May. Of the folk signs, the most reliable is the beginning of the flowering of dandelions.
Preparing for planting bushes
Preparation for planting blackcurrant begins with the selection of a suitable location. Like many other garden crops, she loves warmth and sunlight. Therefore, for the bush, they find an open, flat area or place closer to the top of a gentle hill. You can not plant it in the lowlands - in the spring there is long meltwater, in the summer - cool humid air. At a certain distance from the bushes, it is desirable to have a natural or man-made barrier that would cover them from the north, protecting them from cold winds.

Black currants are planted where it receives enough heat and sunlight, otherwise abundant harvests can not be expected, ripened berries will taste sour
Blackcurrant is generally undemanding in terms of soil quality. The only exception is heavy silty, clayey, peaty soil. Although blackcurrant is a moisture-loving culture (in nature it most often grows along the banks of rivers), it is not able to exist in a swamp. In general, it is undesirable for groundwater to approach the soil surface closer than 1 m.
If there is no other place for the bush, the entire substrate, extracted from the planting pit, will have to be mixed with an equal volume of coarse river sand or to build a mound with a height of at least 0.5 m. But the latter option does not guarantee success. When landing "on the hill", the roots are not adequately protected. Even warming is not a guarantee that the plant will survive, especially if the winter is harsh and not snowy.
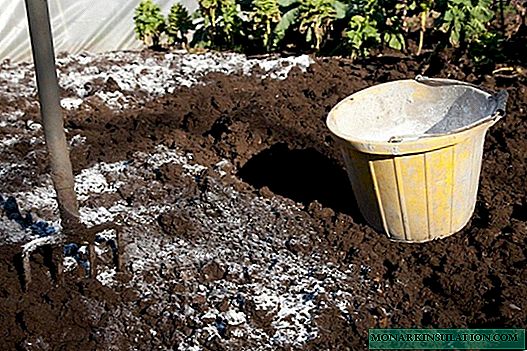
The landing pit is dug 12-15 days before the intended landing. It is quite enough 60-65 cm in diameter and half a meter in depth. Digging further does not make sense, the root system of blackcurrant is superficial, it rarely goes into the ground more than 40-45 cm. Cuttings can be planted in trenches, leaving 20-35 cm between them.

A landing pit for planting blackcurrant is prepared in advance so that the prepared soil settles, a half to two weeks are enough
The upper layer of earth extracted from the pit (15-20 cm of fertile turf) is laid separately. It is mixed with fertilizers - 15-20 liters of rotted manure or humus, 200 g of simple superphosphate and 120-140 g of potassium sulfate. Mineral fertilizers can be replaced with a two-liter can of sifted wood ash. Fresh manure and fertilizing with a nitrogen content in the spring are not introduced - the first can burn the roots, and the second stimulate the rapid formation of green mass, which “fragile roots” are not yet able to “feed”. You can still not use any fertilizer with a chlorine content, for example, potassium chloride. This microelement culture does not like.

Wood ash - a natural source of potassium and phosphorus, an absolutely natural fertilizer
Like most berry bushes, blackcurrant prefers slightly alkaline soil. Therefore, soil acidity indicators need to be determined in advance. If they fall outside the range of 5.0–7.0, dolomite flour, slaked lime, crushed chalk or powdered egg shells (350–500 g) are added to the substrate.

Dolomite flour is one of the most common deoxidants to help reduce soil acidity.
The finished mixture is poured into the landing pit, filling it by about a third. So that the soil does not erode, the pit is covered with some waterproof material, for example, a slate sheet.

Humus helps significantly increase soil fertility
When planting several bushes of blackcurrant at the same time, the distance between them is determined based on the description of the variety. They can be vigorous and sprawling or, conversely, quite compact. As a rule, in most cases, 60-70 cm between adjacent bushes and 1.8-2 m between rows of landings are sufficient. An adult plant needs an area approximately equal to the diameter of the crown for nutrition. It is advisable to place the bushes in a checkerboard pattern - so they all get enough sun.
Seedling Selection
Saplings must be purchased in specialized nurseries or at least from trustworthy private gardeners. Shopping at agricultural fairs or from hand is a big risk. It is impossible to guarantee that the acquired bush will be of the right variety, and that it is generally black currant. It is advisable that the nursery be located in the same area as the garden plot, or to the north. Such plants are already adapted to the climate in this region.
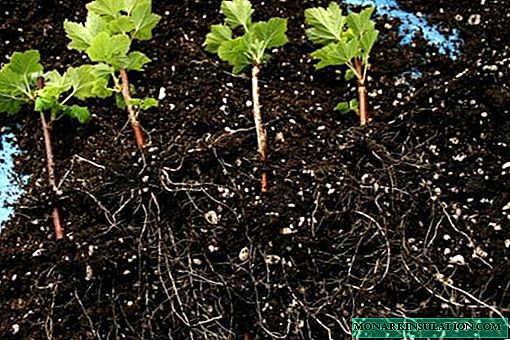
One- or two-year-old blackcurrant seedlings take root best. A normally developed plant at this age has lignified 3-5 branches 15-20 cm long and a fibrous root system 20 cm or more in length. In such seedlings, buds begin to form almost from the base of the shoots, the bushes are more "lush", which positively affects the future fruiting.

When choosing a blackcurrant seedling, the main attention should be paid to the state of the roots
Both branches and roots of healthy seedlings bend, but do not break. The bark on the shoots should be elastic, not wrinkled and not peeling, even in color, without spots and traces similar to rot. The wood beneath it is greenish-white, not gray-brown.
It is best to purchase blackcurrant seedlings in a pot (with a closed root system). Otherwise, all the time before disembarkation into the soil it will have to be constantly kept moist and protected from direct sunlight. In addition, plants planted with an earthen lump take root faster and better in a new place.

Blackcurrant seedlings with a closed root system tolerate transplanting better and take root more quickly
Landing methods and step-by-step instructions
There is nothing complicated in planting seedlings and cuttings of black currant. Even a novice gardener will cope with this procedure.
Planting seedlings
The best time for planting black currants is the morning of a moderately warm day. Bushes planted in the heat, despite abundant watering, rarely take root quickly.
About a day before planting, the open roots of blackcurrant seedlings should be carefully examined. If they are clearly dried up, they are cut off by about a third and soaked in water at room temperature for 12-15 hours. You can replace it with a pale pink solution of potassium permanganate - for disinfection or a weak (3-5 ml per liter of water) solution of any biostimulator - for better adaptation to a new habitat. Suitable, for example, Epin, Kornevin, heteroauxin. The most affordable option is succinic acid (2-3 tablets per liter of water).

Kornevin is one of the most popular biostimulants that increase plant immunity and help you adapt to your new environment faster.
Then the roots are immersed in a mixture of fresh cow manure and powder clay. A properly cooked consistency is similar to a thick cream. To dry it, the seedlings are left in the sun for several hours.
The landing procedure itself looks like this:
- From the fertile land mixed with fertilizers, a mound of 20-25 cm high is formed at the bottom of the planting hole in the center. It should be moderately watered and wait until the water is absorbed.
- The seedling is placed on top of this mound at an angle of about 45º to the soil surface (direction does not matter). This stimulates the rapid development of new lateral roots and the appearance of additional basal shoots. From the bushes set up vertically, "standard" plants with few branches are formed. Their productive period is not so long, their productivity is less. Be sure to ensure that all roots are directed down the "slopes" of the hill. Those that are bent up or stick out to the sides, you need to carefully straighten. Blackcurrant seedlings with a closed root system are removed from the pot so that as little as possible damage the earthen lump.
- Gradually, in small portions, the pit is covered with earth, using the previously excavated soil, which remained unclaimed. Periodically, the seedlings are shaken and gently tamped with the substrate with your hands to avoid the appearance of air "pockets". In the process, monitor the position of the root neck. When the pit is filled to the brim, it should be 5-6 cm below ground level. The same rule applies to transplanted adult blackcurrant bushes - they are planted deeper than they grew. It is more convenient to do this together - one keeps the bush in the required position, the other pours the substrate and compacts it.

When planting, blackcurrant seedlings are placed at an angle - this stimulates the formation of new roots and shoots
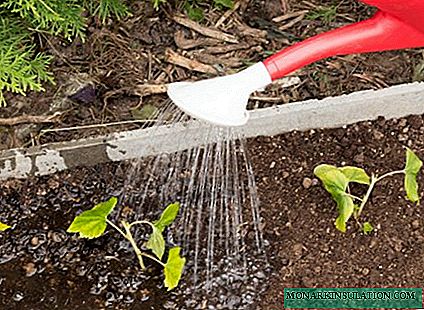
- Filling the pit about half, the seedling is watered, spending 5-7 liters of water. Another watering is carried out, falling asleep to the end and compacting the soil with your foot. They trample it evenly, placing the foot with the toe to the seedling. The second watering is 20-25 liters of water. It is poured into the annular grooves surrounding the seedling. The first is formed at a distance of 20-25 cm from it, one or two more - with the same interval between them.

When watering a blackcurrant seedling, water is poured not directly under the roots (so as not to wash away the soil from them), but in the annular grooves
- After waiting until the water is absorbed, the soil is mulched, creating a layer 3-5 cm thick. For this purpose, peat crumbs, freshly cut grass, compost or humus are suitable. It is undesirable to use straw - mice often settle in it. Sawdust is best used rotted - fresh acidify the soil.
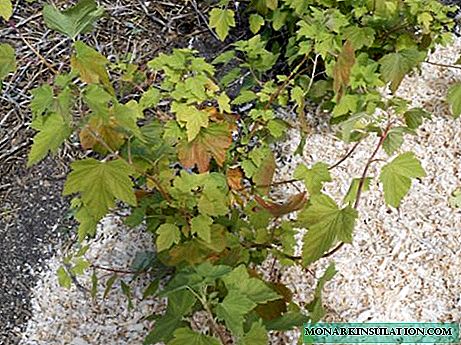
Mulch under blackcurrant bushes helps retain moisture in the soil and saves time on weeding
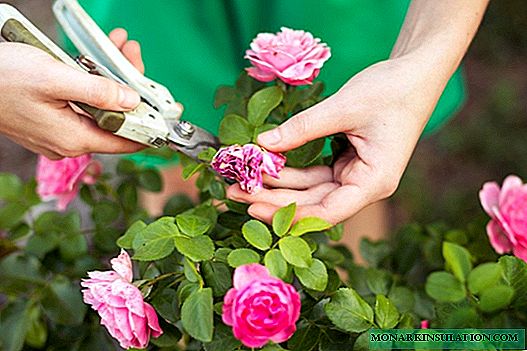
- Each branch is cut, leaving 2-4 leaf buds (about a third of the length). The knife, scissors or pruning shears used for this must be sharpened and sanitized. Cut off parts of the shoots can be soaked for several hours in a solution of any root stimulant and planted in light partial shade, covered with cut plastic bottles. The likelihood that they take root is high enough.

Pruning after planting helps blackcurrant seedlings to "concentrate" on the formation of the root system
- After 18-20 days after planting the seedlings, they are fed, applying 15 g of nitrogen-containing fertilizers under the bush in dry form or in the form of a solution (in 5 l of water). Urea, ammonium sulfate, ammonium nitrate can be used.


Blackcurrant seedling is planted in this way
Experienced gardeners when planting any berry bush or fruit tree recommend putting any old shoe on the bottom of the planting pit. At first glance, such a recommendation seems very strange, but practice shows that such bushes take root faster and better. Perhaps this is due to the smell of a person who repels moles and mice, preventing them from undermining and gnawing roots.
Video: how to plant blackcurrant seedlings correctly
Cuttings
Propagation of blackcurrant by cuttings in comparison with the planting of new seedlings is a much more beneficial method for the gardener. Firstly, you can be sure of the quality of planting material. The bushes thus obtained fully inherit the varietal characteristics of the mother plant. Accordingly, the taste, size of berries, other important criteria are known in advance. Secondly, from one bush you can get for free absolutely not one, for 4-5 cuttings.

The blackcurrant bushes from which the cuttings are taken should be absolutely healthy, they can be marked in advance, last fall
It is best not to prepare the planting material in advance, but to cut the cuttings in early spring, combining this procedure with the next pruning. In this case, you don’t have to think about how to save them during the winter.
Only absolutely healthy bushes are chosen as "donors". Shank - part of the shoot 15-18 cm long and 6-7 mm thick. It is believed that the longer it is, the better it takes root and develops (this depends on the amount of nutrients in it), but more than 20 cm is already a lot. Take them from the lower or middle part of the shoot. Practice shows that the tops do not take root very well.

Blackcurrant cuttings are cut according to certain rules
Cut them off with a sharpened, sanitized knife or scissors. The upper straight section is located 1-1.5 cm above the last kidney, the lower one is made at an angle of 45-50º. The optimal time for harvesting cuttings is the very beginning of March, when the growth buds have not yet turned into “green cones”, but have just begun to swell, forming “eyes”.
A trench under the cuttings is prepared in the fall. The optimal depth is 20-25 cm. A mixture of humus and rotted compost is poured to the bottom (1: 1). Enough 10 liters per m². Cuttings are planted as soon as the soil thaws to the full depth of the trench. The wetter the substrate, the better they will take root.
The procedure itself looks like this:
- Loosen the soil well in the trench. Dry soil should be watered and allowed to absorb moisture.
- Sprinkle the lower cut of the stem with any powdery root stimulator (Kornevin, Zircon).
- At a distance of 20-35 cm (this depends on how spreading the bush is supposed and what growth rate it has), place the cuttings in a checkerboard pattern at an angle of 45-50º to the surface of the earth. They are buried in the soil by 3-4 cm. Only 2-3 kidneys are left on the surface, the lower one - above the substrate itself.

Blackcurrant cuttings, like seedlings, are planted at an angle to stimulate root formation
- Moderately pour the cuttings, consuming 5-7 liters of water warmed up to room temperature per m². When the water is absorbed, mulch the “trunk circle” with peat crust or compost, creating a layer 2.5–3 cm thick. The mulch, which helps to keep moisture in the soil, can be replaced with a black plastic film, making holes for cuttings in it. It not only has similar properties, but also prevents the appearance of weeds.
- If there is a risk of spring return frosts that are not out of the ordinary in most of the territory of Russia, the cuttings are insulated by covering with cut-off plastic bottles or by tightening the trench with any covering material that passes air (lutrasil, agril, spanbond).
- During the summer, constantly maintain the soil in a slightly moist state, after each watering, loosen it and weed out the weeds. About once every 15-20 days you can water the cuttings with infusion of fresh cow manure, bird droppings, nettle greens or dandelion leaves.
The soil in the bed with rooted blackcurrant cuttings must be constantly maintained in a slightly smooth state
- By autumn, small bushes should form from the cuttings. They are insulated so that they survive the winter safely, and next spring they are transplanted to a permanent place, as well as seedlings. Since the cuttings do not differ in size, they can be completely covered with cardboard boxes, stuffed with shavings, straw, small pieces of newsprint. In the fall, the mulch layer must be renewed, bringing its thickness to 5-6 cm.

Blackcurrant cuttings develop quite quickly, next fall such bushes can already be transplanted to a permanent place


If the gardener missed the time to get lignified cuttings, you can use green. This is the top of a young shoot, cut off at the place where the lignified part passes into the still green. In this section, the branch bends well, but if you do it abruptly, it still breaks. Harvesting material is harvested at the end of May, preferably in cloudy weather or in the early morning.

Green stalk, unlike lignified - this is the top of blackcurrant shoot
The optimal length of a green stalk is 9-14 cm. There should be 3-5 leaves on it. The bottom one or two can be removed, leaving half or even one petiole. From below, a slice is made at a distance of 5-7 mm from the lower kidney, from above - immediately above the last sheet. Both must be straight.

Planting green cuttings of blackcurrant has some nuances
The base of the cuttings is wrapped in a damp cloth, then put on a plastic bag. This is a necessary procedure, even if the landing is planned in just a few hours.
The procedure is slightly different from that recommended for lignified cuttings:
- For 20-24 hours, soak the base (lower 1.5-2 cm) of the cuttings in a solution of heteroauxin or indoline-butyric acid (1 g or 5 g, respectively, per 10 l of room temperature water). From above, the container with them is covered with a damp cloth, which, as it dries, is sprayed from the spray gun.
- In a greenhouse or greenhouse, dig a trench 10-15 cm deep. Pour clean river sand or a mixture of it with peat crumb in equal proportions to the bottom, creating a layer 4-5 cm thick. Water the substrate abundantly and let it soak in moisture.
- At a distance of 8-10 cm from each other, plant the cuttings, deepening the lower part into the soil by 2-3 cm. 5-7 cm are left between the rows. They are planted strictly vertically.
- Cover the cuttings from direct sunlight with twigs or wet gauze. You can spray the glass of a greenhouse or greenhouse in this place with lime mortar from the inside.
- For 2.5-3.5 weeks, spray the cuttings with warm water 3-4 times daily. As soon as new leaves begin to appear, switch to daily moderate watering. Every 15-20 days, fertilize with nitrogen-containing fertilizers.
- Next spring, transplant cuttings in trenches in the open air. In the fall they can be moved to a permanent place.

Dusting green cuttings with a root stimulant increases the chances that they will take root
Video: rooting cuttings
Propagation by layering
Reproduction by layering allows you not to injure the bush with pruning. In autumn, plants with their own fully formed root system are separated from it. The best time to start the procedure is mid-April (until the buds open).

Obtaining new blackcurrant bushes from layering is a method that takes away from the gardener a minimum of time and effort
The method is suitable for propagation of any kind of currant, but in black the developed roots appear during the season, in white and red one can wait 2-3 years. On average, 4-6 seedlings are obtained from each shoot.
- Bend some 2-3 year old branches, attaching them to the ground in several places with pieces of wire curved in the shape of the letter U or ordinary hairpins. It is advisable to dig a groove 5-6 cm deep under them, fill it with a mixture of peat crumb, humus and rotted compost, taken in approximately equal proportions.
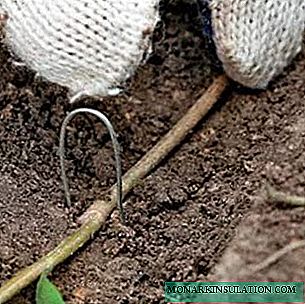
As a rule, a blackcurrant shoot attached to the ground during the summer gives 4-6 viable layering
- Moisten the substrate well in the trench. When the water is absorbed, cover the shoot with the same nutritious soil without compacting it. Although there are different points of view on this subject - some gardeners recommend leaving the groove open until the first vertical shoots appear and only then sprinkle forming roots. Cut the top of the branch so that 6-8 cm sticks out of the ground.
- Further care for layering consists of regular watering, weeding and loosening of the soil. The base of the shoots, reaching a height of 8-10 cm, is sprinkled with a layer of moist fertile soil (2-3 cm). When they grow by the same amount, the procedure is repeated, bringing the height of the "knoll" to 7-10 cm.
- In the second decade of September, cut the horizontally located shoot with secateurs. Young plants are removed from the ground and inspected. Those whose roots are sufficiently developed can immediately be transplanted to a permanent place. The rest are dug up again for the winter, cutting off all the branches by about half, and in the spring they are planted for growing in the same way as seedlings. In the fall they are transferred to a permanent place.
Some bushes formed from blackcurrant layering can be planted in a permanent place in the fall


Video: blackcurrant propagation by layering
Blackcurrant is considered to be a fairly unpretentious crop in care. This also applies to cuttings and seedlings, which, as a rule, take root in a new place without problems and stably bear fruit after transplantation. New bushes quickly give root and are taken in growth. Nevertheless, there are certain rules that you must familiarize yourself with in advance and adhere to them, especially when propagating a valuable bush with large sweet berries or when planting a seedling of a deficient variety.